Gitment配置
博客的评论系统经过几年的发展,陆陆续续关闭了一些,经过长时间的选择,最后还是选择了Gitment。
hexo+gitment我相信有很多人是这么配置的,网上也有许多教程是如何将gitment集成进博客的,但是随着next主题的升级,设置的方法也比前面简单了,接下就开始教程吧!
本次使用next v6.6.0版本,已经集成gitment,不用再新建ejs文件
GitHub授权接入
Gitment是使用的GitHub Issues作为评论系统,在接入Gitment前,需要获得GitHub的授权,获得相应的客户端id和客户端私钥,以备站点使用。
登录自己的GitHub账号,然后打开https://github.com/settings/developers,点击New OAuth App
按照以下图中说明配置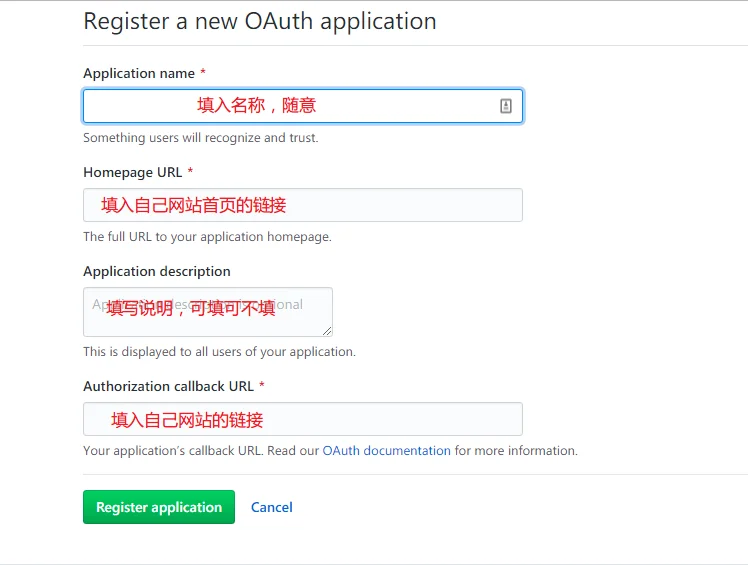
填写完毕之后就会得到Client ID和Client Secret
新建一个仓库,注意这个仓库的权限必须是公共的,不能是私有的,而这个仓库的作用就是使用该仓库的issue作为评论存储。
Gitment配置
找到自己主题文件下的配置文件_config.yml中配置gitment的位置
1 | |
完成之后就可以了,然后重新部署网站即可。